Hi, Y'all!
Last week we already had Winter wonderland here in our area, and therefore it's time to have a closer look at Christmas decorations! In the last years my colorscheme was mostly white, but our new home bears some black accents (e.g our stairway and the wrought iron handles of the kitchen cabinets), and as the kitchen has some farmhouse vibes I wanted to reflect that rustic style in my decoration. My inner rule was to avoid buying new and diy everything with items which are already existing in my household. Well, I bought one roll of craft paper, some ribbon, three little bottlebrush trees and a slightly larger wooden one. But that's all, really.
Well, then let the craziness begin... I started with repurposing some of these free magazines which are published in every city, I guess. I had two or three of them, all events were either already over or cancelled due to obvious reasons; therefore I could transform them - at first into tons of thin paper rolls:


Or into a tube (depending on the mold - hairspray can or glue stick - the diameter will be larger or smaller):

You can connect that tube to a very nice wreath and either let it colorful as is or paint it. Pro tip: take spray paint, otherwise you'll need lots of patience and chocolates :)

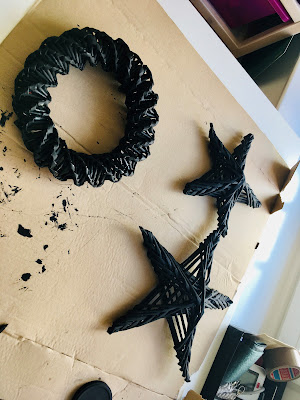
The whole project was intended for our apartment door. These suction cup hooks never work for me, and of course I didn't want to use thumbtacks on our door, thus I took advantage of counterbalance. Which means I connected wreath and stars with some nice ribbon and run that ribbon over the top of our door. Outside you can now see the wreath and inside the two stars. And as the ribbon is very thin the door opens and closes without any problem. Clever, right?


Let's stay with that color - you may remember the milk carton houses. Sure, I didn't move them, but made new ones - this time in black.


To have 3D trees, just form a cone out of card stock and then wrap it in yarn:

Moreover, you can make tassels from the yarn and arrange it like a tree:

Together with the aformentioned storebought tree the arrangement looks like this:


Here are some more examples on the minimalistic side - you could perfectly use them as holiday cards, I'd say:

In connection with the overall concept:


But let's jump back to the holiday cards... This year ours look like this:

The stars or wreaths I folded out of an old book with Christmas stories and glued them onto craft paper. And as the book had some more pages left over, I wanted to use them as well. I made quite a nice pile of cones:


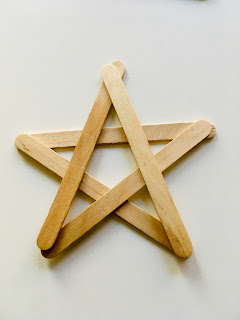

With popsicle sticks you can also make some cute little ornaments to decorate your presents or hang in the tree:


These were all my diy projects - at least regarding decorations. All my Christmas gifts were handmade, too. But you might imagine that I can't show them right now. As compensation a few impressions of our complete holiday decor...


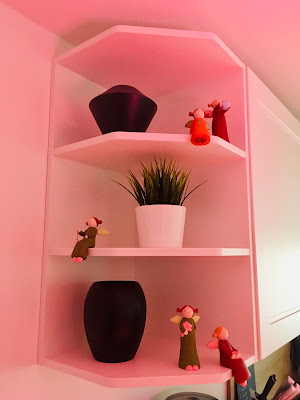


The individual items itself aren't very over the top with a lot of glitz and bling; they are more simple and minimalistic. But if you have a lot, and I mean A LOT of these minimalistic things, what's it called then - minimax???
No comments:
Post a Comment